Creating Articles
Before you can process sales, you need articles. The fastest way: import an existing menu. If you don't have a digital list, create articles manually.
Step 1: Import Menu (recommended)
If you already have a menu as an Excel, CSV, or even as a PDF/photo, you can import it directly. DiKAS recognizes the columns automatically.
Admin → Datenimport → Artikel-Import
Supported Formats
| Format | Description |
|---|---|
| Excel (.xlsx) | The most common option — e.g., export from another POS system or a self-created list |
| CSV / TXT | Text files with semicolon, comma, or tab as delimiter |
| Price list as PDF — read by AI | |
| Image (JPG/PNG) | Photo of a printed menu — read by AI |
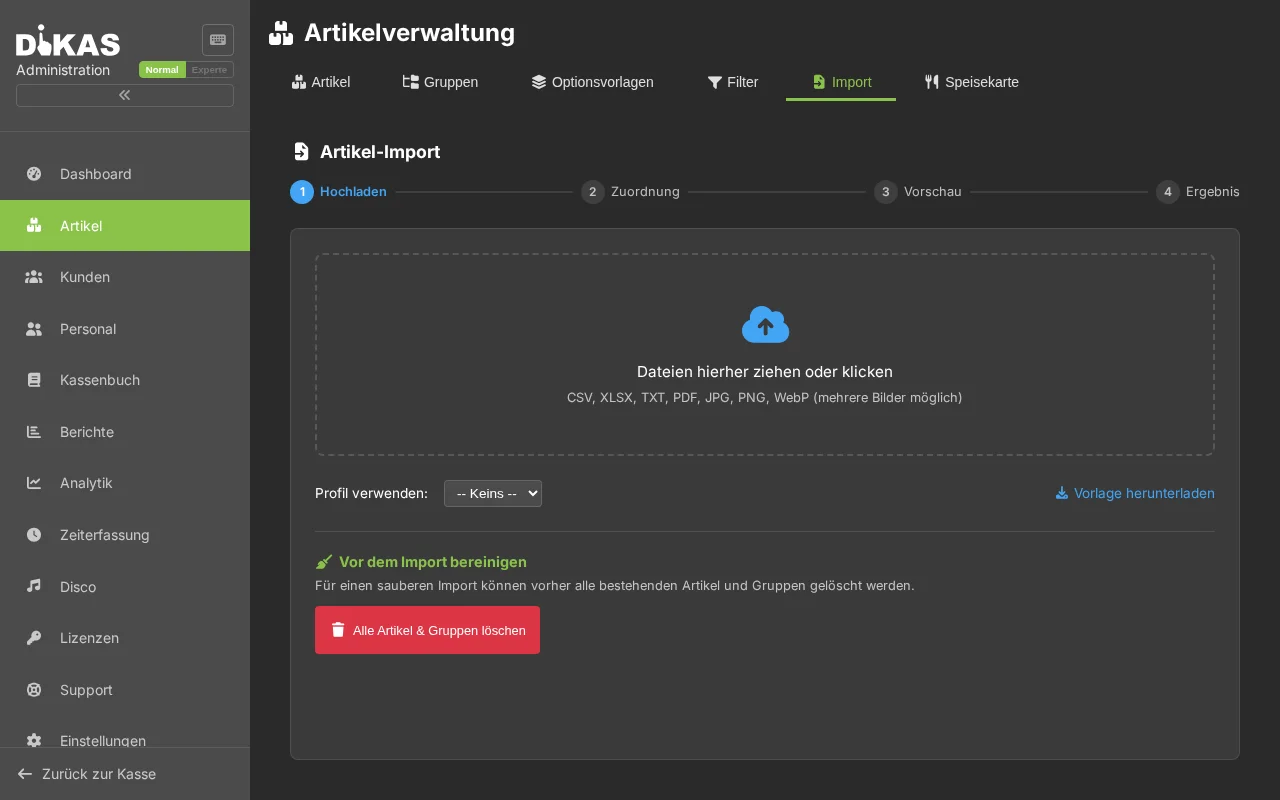
Performing the Import
- Navigate to Admin → Datenimport → Artikel-Import
- Drag your file into the upload area or click "Datei auswählen" (Select file)
-
Map columns — DiKAS analyzes your file and automatically suggests what each column represents:
Your column DiKAS field "Bezeichnung" or "Artikelname" Name "VK-Preis" or "Preis" Price "MwSt" or "Steuer" Tax rate "Kategorie" or "Warengruppe" Group "PLU" or "ArtNr" Article number "EAN" or "Barcode" Barcode If the automatic detection doesn't match, you can correct the mapping via dropdown.
-
Review preview — You see how many articles will be imported and whether there are duplicates
Duplicate handling Description Skip Do not change existing articles Update Overwrite existing articles with new data Replace Delete existing articles and create new ones -
Click "Importieren" (Import) — The result shows how many articles were created, updated, or skipped
Tip
New article groups are automatically created when the group from your file does not yet exist in DiKAS. You do not need to create the groups beforehand.
AI Import (PDF and Photos)
If your menu is only available as a PDF or on paper:
- Upload the PDF or take a photo of the menu (JPG/PNG)
- DiKAS sends the file to an AI provider (OpenAI, Anthropic, Google Gemini, or local Ollama)
- The AI extracts article names, prices, groups, and tax rates
- The result appears as a tabular preview — from here, continue as with Excel/CSV (steps 3–5)
Without your own API key, 2 free AI imports are available. For unlimited use, enter your own API key under Admin → Einstellungen → KI-Import.
Excel Template
If you need to digitize your menu first: Click "Vorlage herunterladen" (Download template) in the import dialog. You will receive an Excel file with all columns and explanations — simply fill it in and import.
→ Data Import in Detail — Import profiles, advanced settings
Step 2: Create Articles Manually
If you don't have a menu to import, create groups and articles by hand.
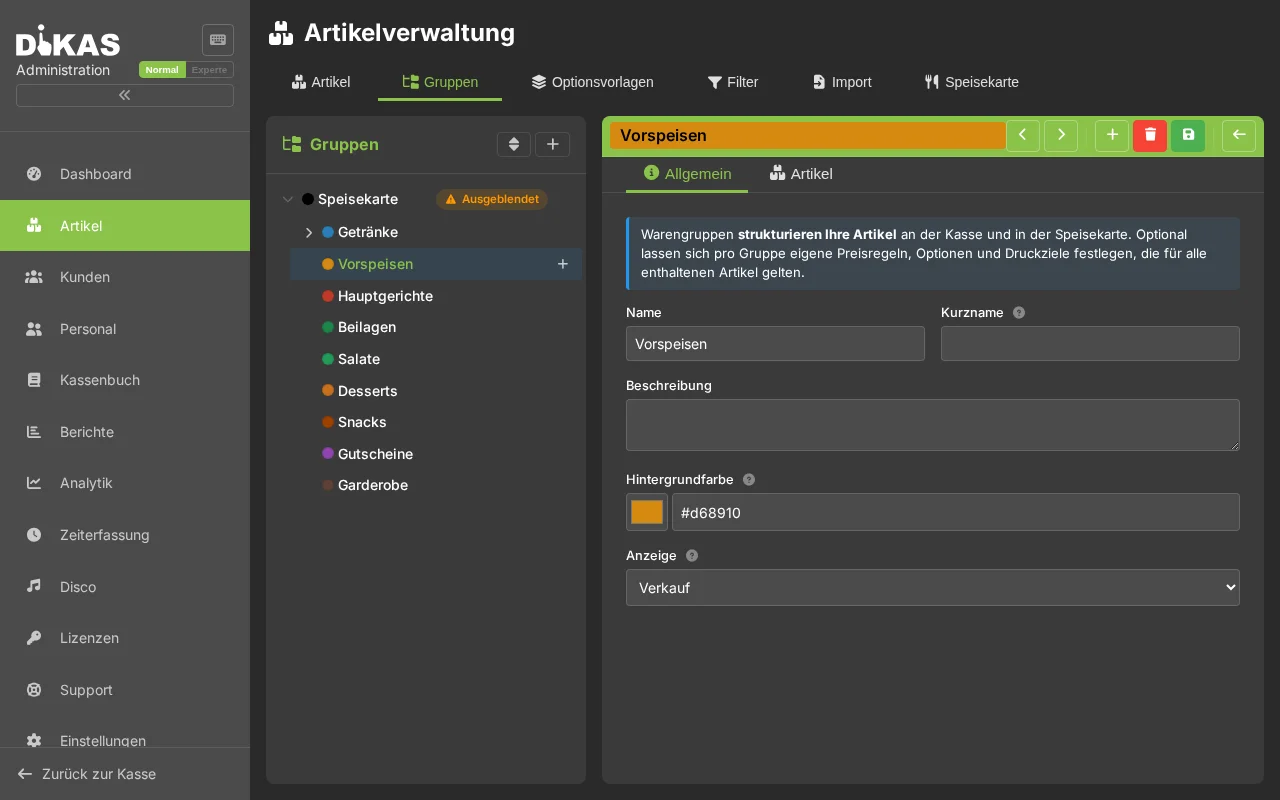
Creating Article Groups
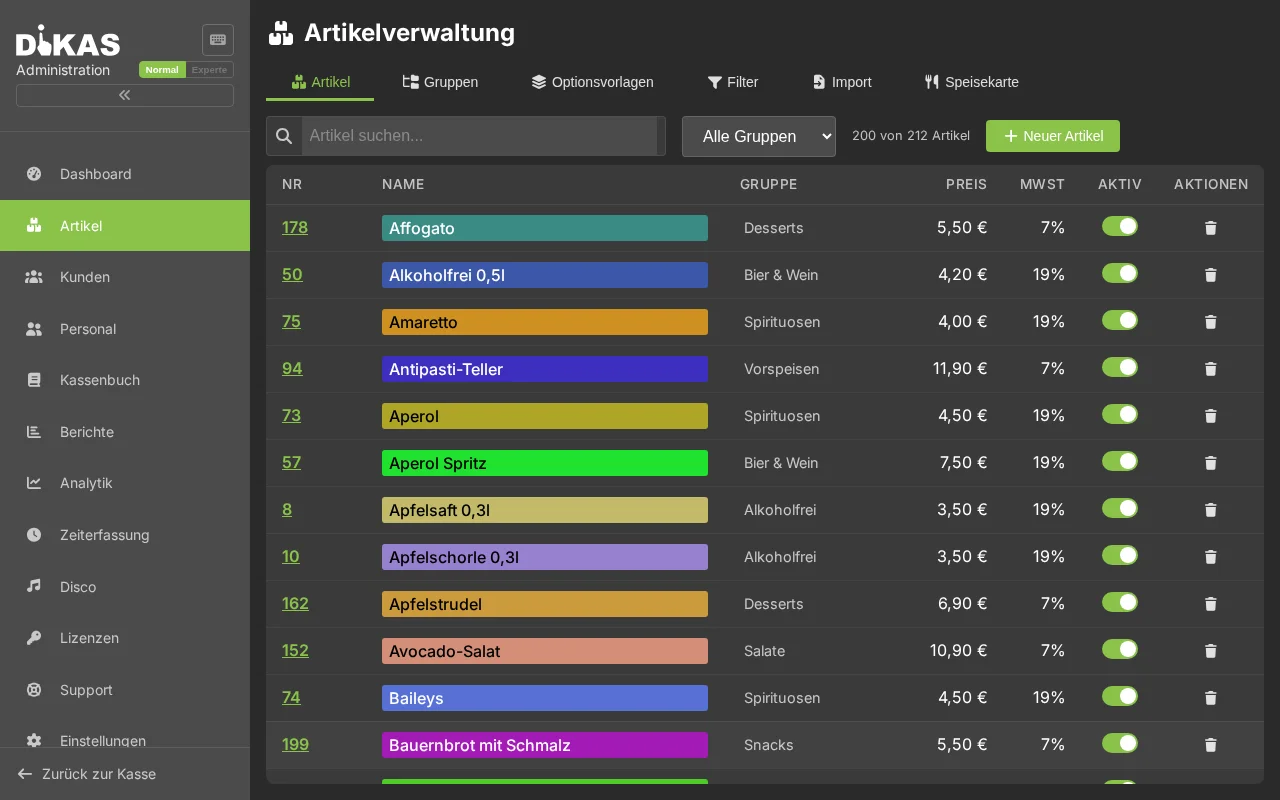
Admin → Artikel — Group structure on the left, article list on the right.
- Click "+ Gruppe" (+ Group)
- Enter the name, e.g., "Getränke" (Beverages)
- Optional: Select a parent group (for subgroups)
- Optional: Choose a color (appears as background in the POS)
- Click "Speichern" (Save)
Example structure for a restaurant:
100 Getränke
├── 110 Alkoholfrei
├── 120 Bier
├── 130 Wein
└── 140 Cocktails
200 Speisen
├── 210 Vorspeisen
├── 220 Hauptgerichte
├── 230 Desserts
└── 240 Beilagen
300 Verschiedenes
├── 310 Gutscheine
└── 320 Pfand
The numbers determine the sort order in the POS. Place frequently used groups at the top (low numbers).
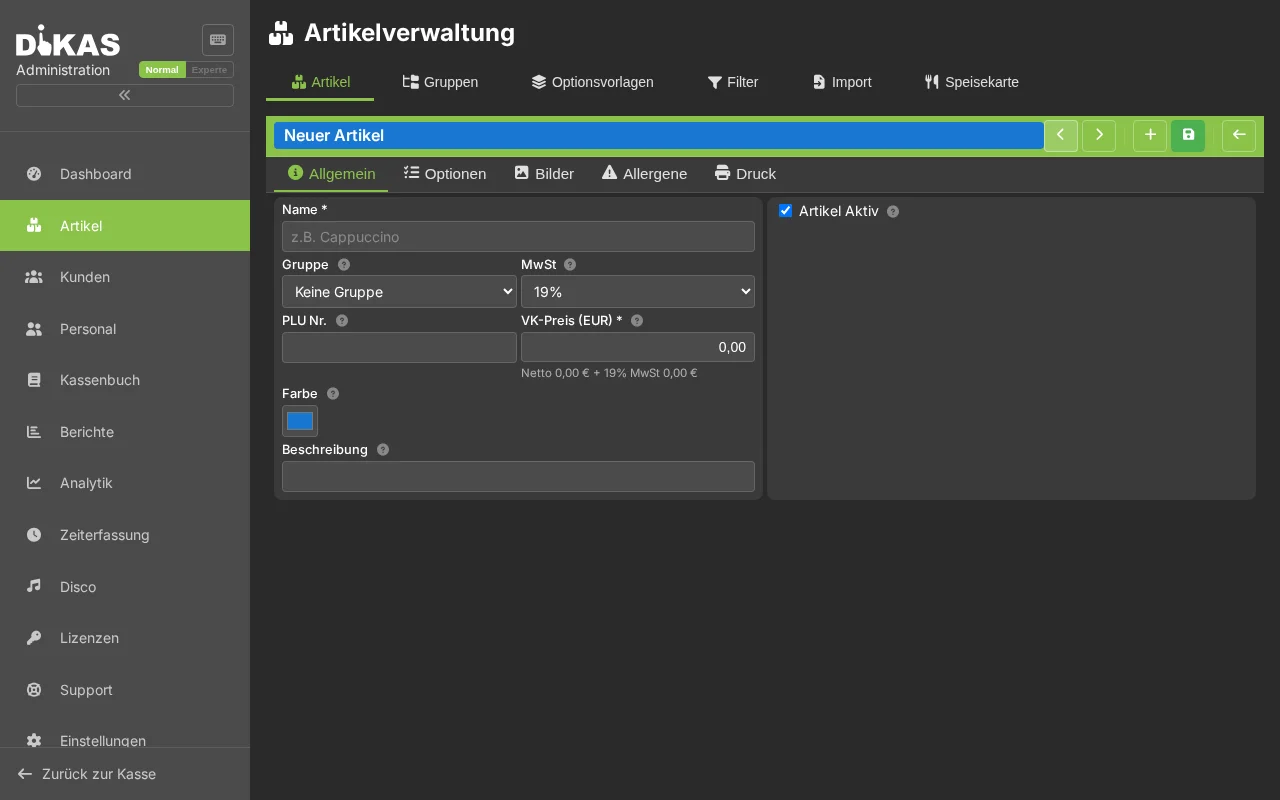
Creating an Article
- Select an article group (e.g., "Alkoholfrei")
- Click "+ Artikel" (+ Article)
- Fill in:
| Field | Example | Required? |
|---|---|---|
| Name | Cola 0,3l | Yes |
| Price | 3,50 | Yes |
| Tax class | Normal (19%) | Yes |
- Click "Speichern" (Save) → The article appears immediately in the POS.
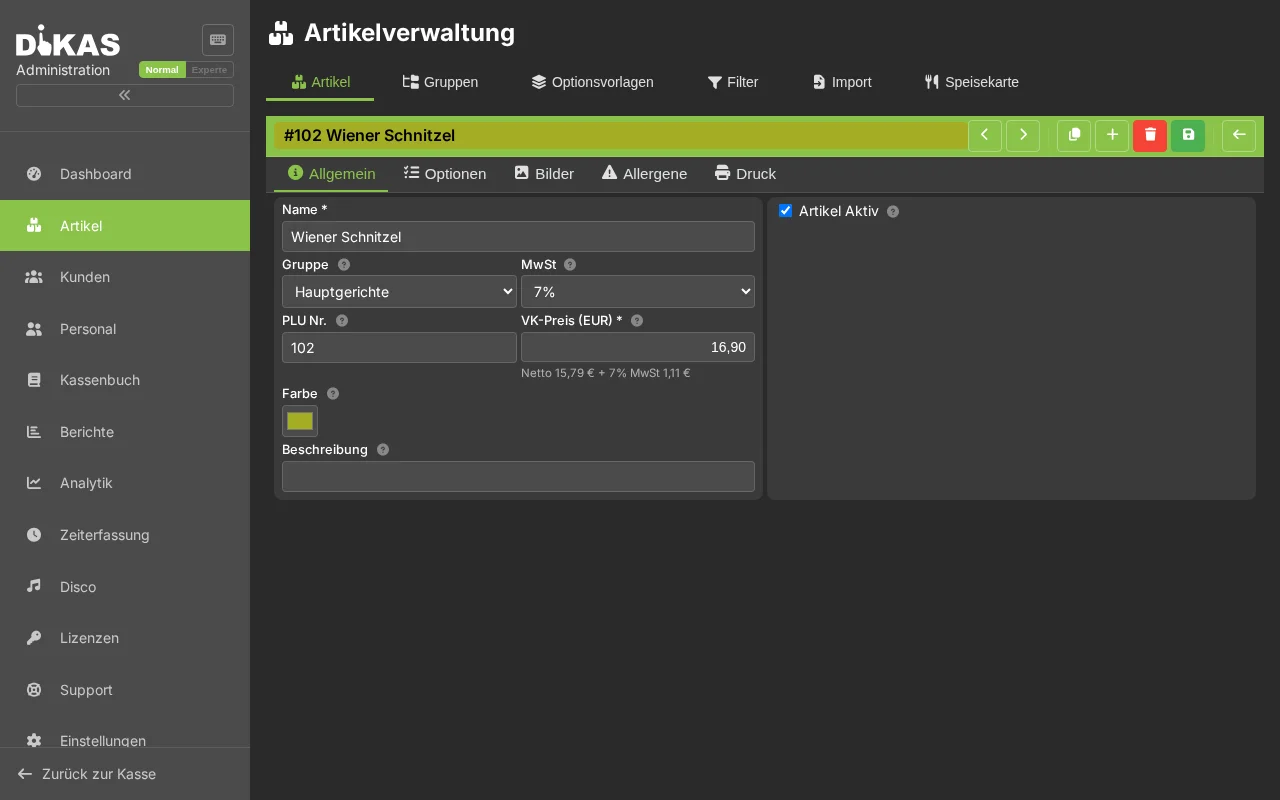
All Important Fields
For a fully configured article:
| Field | Description | Example |
|---|---|---|
| Name | Display name in the POS | Cola 0,3l |
| Short name | Compact name on the receipt | Cola |
| Article number | Unique number (PLU) | 1001 |
| Barcode | EAN code for scanner | 4006381333931 |
| Price | Selling price (gross) | 3,50 |
| Price 2 | Alternative price (e.g., happy hour) | 2,50 |
| Tax class | Normal (19%), Reduced (7%), Free (0%) | Normal |
| Allergens | EU-14 allergens (A–N) | Milk, Gluten |
| Is active | Show in the POS | Yes |
| Course | Kitchen course (starter=1, main=2, dessert=3) | 2 |
| Sort order | Position within the group | 10 |
| Color | Background color in the POS | #FF6B35 |
Assigning Tax Classes Correctly
| Article type | Tax class | Reason |
|---|---|---|
| Beverages (all) | 19% | Always full rate |
| Food (all) | 7% | Reduced rate (since 01.01.2026 uniform, regardless of dine-in or takeaway) |
| Voucher sales | 0% | Tax-free (liability) |
| Deposits | 0% | Tax-free |
Uploading Article Images
Each article has one central image gallery. The same images serve as the POS icon and are shown for online ordering (table self-order, webshop) and at the self-order kiosk.
- Open the article → Tab "Bilder" (Images)
- Drop an image via drag & drop or click to upload (JPG, PNG, GIF, WebP)
- On upload the image is automatically optimized for the web (WebP + thumbnail)
- The image marked with the gold star "Primary" is the POS icon — switchable via "Set as primary"
Square images (e.g., 400×400 px) look best.
Articles with Options (Extras)
For articles with choices — pizza toppings, doneness level, drink sizes, sides:
Option Directly on the Article
- Open the article → Tab "Optionen" (Options)
- Click "+ Optionsgruppe" (+ Option group)
- Add options
There are two types of option groups:
Multiple selection — the guest can choose several options at once (e.g., pizza toppings):
| Option | Surcharge |
|---|---|
| Ham | +1.50 € |
| Mushrooms | +1.00 € |
| Olives | +1.00 € |
| Extra mozzarella | +2.00 € |
Single selection — the guest chooses exactly one option from a list (e.g., doneness for a steak):
| Option | Surcharge |
|---|---|
| Rare | 0.00 € |
| Medium rare | 0.00 € |
| Medium | 0.00 € |
| Well done | 0.00 € |
Further examples for single selection: side dish choice (fries, rice, salad), size choice (0.3l / 0.5l), sauce choice.
In the POS, a dialog for selecting options appears when the article is tapped.
Option Group Settings
| Setting | Description |
|---|---|
| Single selection | Only one option from the group can be selected (e.g., doneness, side dish choice) |
| Free quantity | The N cheapest options are not charged (e.g., "3 toppings included") |
| Deduction on deselection | When a default topping is deselected, the price is deducted |
Option Templates (for multiple articles)
When multiple articles share the same options (e.g., all pizzas have the same extra toppings):
- Admin → Optionsvorlagen → "+ Neue Vorlage" (+ New template)
- Create template "Pizza-Extras"
- Add option groups
- On the pizza articles: under "Vorlage" → select "Pizza-Extras"
Changes to the template automatically apply to all linked articles.
Printer Options & Kitchen Printing
When a guest places an order, each article must arrive at the correct station — pizza to the kitchen, cola to the bar, salad to the salad station. DiKAS handles this automatically via printer options on article groups and articles.
Receipt Types
| Receipt type | Description | Example |
|---|---|---|
| Station ticket (ExtraBon) | A single ticket per article to a specific station | Pizza ticket to the kitchen printer |
| Consolidated order ticket (Sammelbon) | Combines all articles of an order going to the same printer | All food items of an order on one kitchen ticket |
| Kitchen display (KDS) | Order appears on a screen instead of on paper | Order display on the kitchen screen |
Configuring Printer Options
Printer options are set on the article group (e.g., group "Pizza" → station ticket to kitchen printer). This means: all articles in this group automatically go to the correct printer.
Example configuration:
| Article group | Station ticket 1 | Station ticket 2 | Consolidated ticket |
|---|---|---|---|
| Pizza | Kitchen printer | — | Kitchen printer |
| Pasta | Kitchen printer | — | Kitchen printer |
| Salads | Salad printer | — | Salad printer |
| Beverages | Bar printer | — | Bar printer |
Result: Guest orders pizza + salad + cola → Three tickets automatically go to three different stations.
With Station ticket 2, you can additionally send an article to a second station (e.g., a dessert goes to the kitchen and simultaneously to the bar, so the matching drink can be prepared there).
Inheritance (Group → Subgroup → Article)
Printer options are inherited from top to bottom — just like article rules:
Speisen (ExtraBon → Küchendrucker)
├── Pizza       → erbt Küchendrucker
├── Pasta       → erbt Küchendrucker
└── Salate      → überschreibt mit Salatdrucker
DiKAS searches for the printer option in this order:
- Article — does the article have its own printer options? → use these
- Group — does the direct article group have printer options? → use these
- Parent group — does the parent group have printer options? → use these
- Further up — up to the top-level group
This way, it is sufficient to set the printer once on the main group "Speisen" (Food). Only when a subgroup (e.g., "Salate") should go to a different printer is it overridden there.
Area-Dependent Printers (Service Areas)
If different areas (indoor, terrace, beer garden) have different printers or stations:
- Open article or group → Bereichsabhängige Druckoptionen (Area-dependent print options)
- Assign a different printer per service area
| Service area | Printer |
|---|---|
| Indoor | Kitchen printer main kitchen |
| Beer garden | Kitchen printer outdoor kitchen |
| Terrace | Kitchen printer main kitchen |
Result: The same pizza goes to the main kitchen indoors and to the outdoor kitchen in the beer garden.
→ Articles, Printers & Rules — Quick Start — Step by step with practical examples → Articles, Printers & Rules — Detailed — All options in detail → Kitchen Printer & Kitchen Display — Course control and screen-based orders
Tips for Organization
Order in the POS: Articles appear in the order of their group number and sort order. Place best-selling groups at the top.
Use colors: Give groups and articles different colors — this helps staff find the right article faster.
No longer available: Instead of deleting an article, set it to "Nicht aktiv" (Not active). This way it is preserved in old receipts but no longer appears in the POS.
Price rules: You can set up time-based prices, e.g., happy hour prices between 17:00 and 19:00, discounts for customer groups, or area-dependent surcharges (e.g., beer garden +0.50 €). Price rules are inherited like printer options from the group to all articles below. → Price Rules in Detail
Next Step
→ Setting Up Tables — If you have table service → First Sale — Process sales directly without tables