Setting Up Tables
If you run a restaurant with table service, set up your table plan here. DiKAS supports graphical table plans with various shapes, decoration elements, and real-time status display.
Creating Table Groups
Tables are organized in groups — e.g., by sections of your venue.
Admin → Tische → "+ Gruppe" (+ Group)
| Field | Example | Description |
|---|---|---|
| Name | Terrasse | Group name |
| Color | #4CAF50 | Background color in the POS |
| Sort order | 10 | Order in the table overview |
| Show table plan | Yes | Show graphical plan or list only |
| Seat selection | No | Capture seat number when ordering |
Typical table groups:
| Group | Description | Tip |
|---|---|---|
| Indoor area | Dining room | Main group, low sort order |
| Terrace | Outdoor area | Show/hide seasonally |
| Bar | Bar seats / counter | For walk-in customers |
| Private room | Side room, events | For private functions |
| VIP | Special area | Distinct color for easy identification |
Creating Tables

- Select a table group
- Click "+ Tisch" (+ Table)
- Fill in:
Basic Data
| Field | Example | Description |
|---|---|---|
| Table number | 1 | Unique, displayed in the POS |
| Name | Eckplatz (Corner seat) | Optional display name |
| Seats | 4 | Number of seats |
| Sort order | 10 | Order within the group |
| Active | Yes | Show in the POS |
Appearance
| Field | Description |
|---|---|
| Shape | Rectangle, square, round, or oval |
| Width / Height | Size in the table plan (in pixels) |
| Rotation | Rotation from −90° to +90° |
| Position X / Y | Placement in the graphical table plan |
The color of a table is not set manually but automatically indicates the current status (see Table colors in the POS).
Optional Fields
| Field | Description |
|---|---|
| Receipt text | Additional text on every receipt for this table (e.g., "Terrace") |
| Printer table number | Alternative number for kitchen printer |
| Tap system table number | Table number for draught system |
Table Shapes
DiKAS supports 4 table shapes for the graphical table plan:
| Shape | Display | Typical use |
|---|---|---|
| Rectangle | ▬ | Long tables, banquet tables |
| Square | ■ | Standard tables |
| Round | ● | Round tables, standing tables |
| Oval | ⬭ | Oval tables, conference tables |
🗺️ Graphical Table Plan
In the Admin area, you can arrange tables via drag & drop on a workspace. The plan represents your venue realistically.
Decoration Elements
In addition to actual tables, you can place decoration elements that serve only for orientation:
| Element | Description | Usage |
|---|---|---|
| Wall | Horizontal/vertical wall | Show room divisions |
| Counter | Counter/bar area | Bar, POS area |
| Stairs | Staircase area | Mark floor changes |
| Bar | Bar area | Serving area |
| Plant | Decoration | Planters, room dividers |
| Divider | Thin line | Visually separate areas |
Decoration elements are displayed with a dashed border and slight transparency. They have no table number and cannot be occupied.
Designing the Table Plan
- Admin → Tische → Select a group
- Position tables and decoration elements via drag & drop
- Adjust size and rotation
- Click "Speichern" (Save) — the plan is immediately applied in the POS

Orient yourself by the actual floor plan. Place walls and counters as reference points, then position the tables within them.
Table Colors in the POS
Tables do not have a fixed color — the color changes automatically based on status. This gives you an at-a-glance overview of what is happening at each table:

| Color | Status | Meaning | When? |
|---|---|---|---|
| Green | Free | Table is available, no orders | Default state, or after payment/cleaning |
| Yellow | Newly occupied | Table was just opened, but no order placed yet | Server tapped the table, currently selecting articles |
| Red | Occupied | Open orders exist | Order was submitted with "Bestellen" (Place order) |
| Orange | Reserved | Reservation exists for this table | Reservation was created in the system |
| Purple | Cleaning | Table still needs to be cleaned | After payment (when cleaning requirement is enabled) |
| Gray | Blocked | Table is not available | Manually blocked (e.g., defective, renovation) |

Typical Color Sequence of a Table
Cleaning Requirement (optional)
For businesses that require a cleaning confirmation after checkout:
Admin → Einstellungen → Betrieb → "Tisch-Reinigungspflicht"
Workflow with Cleaning Requirement
- Guest pays → Table turns purple (instead of immediately green)
- Staff cleans the table
- Long press on the purple table → "Als gereinigt markieren" (Mark as cleaned)
- Table turns green again (free)
Without the cleaning requirement, the table turns green again immediately after payment.
Table Info
In the POS, you can view details of a table at any time:
- Long press (approx. 0.5 seconds) on a table
- The table info panel opens:
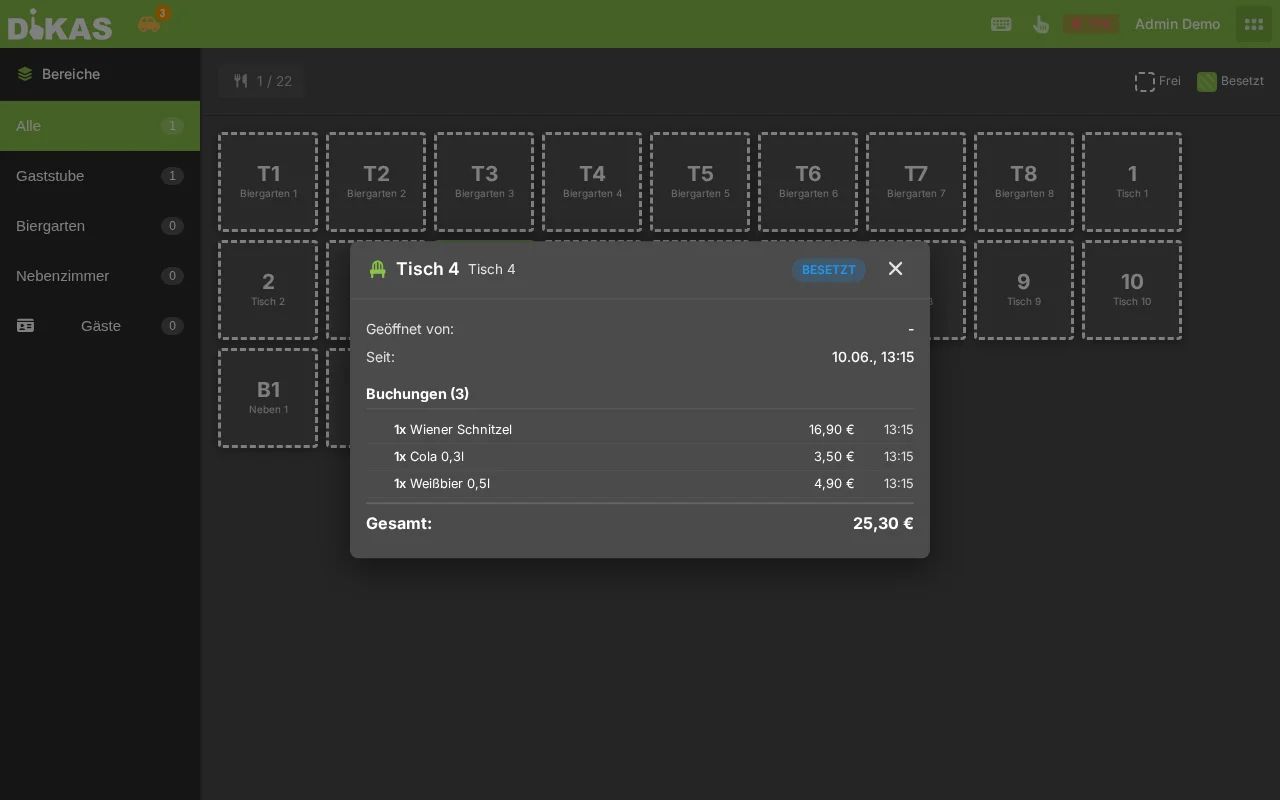
| Information | Description |
|---|---|
| Orders | All open items with prices |
| Server | Who is serving the table |
| Total amount | Current sum of all orders |
| First order | Time of the first booking |
| Current course | Course number (if course system is active) |
🍽️ Course System (Multi-Course Menus)
For restaurants with multi-course menus, you can use the course system:
Admin → Einstellungen → Frontend → "Gang anzeigen" (Show course)
Using Courses
- Occupy a table and take orders
- Long press on the table → Table info opens
- Select the course button (course 1 to 6)
- All open orders for the table are assigned to the selected course
- The kitchen printer prints the course ticket (if configured)
| Course | Typical use |
|---|---|
| 1 | Amuse-bouche |
| 2 | Starter |
| 3 | Intermediate course / Soup |
| 4 | Main course |
| 5 | Dessert |
| 6 | Coffee / Digestif |
The course change is sent to the kitchen printer so the kitchen knows which course to prepare next.
Guest Tables (NFC Cards)
When customers have an NFC customer card, DiKAS can automatically create a guest table:
- Customer holds the NFC card to the reader
- DiKAS automatically creates a virtual table
- Orders are booked to this table (= customer card)
- At checkout, the card is settled
Guest tables appear in the system group "Gäste" (Guests) and are automatically cleaned up after settlement.
Tips for Organization
Numbering: Use a logical numbering system — e.g., 1–20 for indoor, 101–120 for terrace. This helps servers find the right table faster.
Seasonal groups: Create a "Terrace" group and deactivate it in winter. The tables are preserved but not visible in the POS.
Events: For special occasions, you can create temporary table groups (e.g., "Christmas party Company XYZ") and deactivate them afterwards.
Seat selection: Enable the "Seat selection" option for groups where servers need to know which guest ordered what — e.g., for table service without asking back.
Next Step
→ Adding Staff — Employees with different permissions