Kitchen Printer & Kitchen Display
Orders are automatically forwarded to the kitchen — either as a printed ticket or on a screen (Kitchen Display System). This way, the kitchen instantly sees what needs to be prepared without the waiter having to come in person.
Kitchen Printer
Setup
- Admin → Settings → Printers
- Create a new printer:
| Field | Description | Example |
|---|---|---|
| Name | Printer designation | Kitchen printer |
| IP address | Network address | 192.168.1.51 |
| Port | ESC/POS standard | 9100 |
- Admin → Articles → [Article group]
- For the group "Dishes", assign the kitchen printer as the receipt printer
Now all food orders are automatically printed on the kitchen printer.
What Is Printed?
A kitchen ticket contains the table number, course, items with options, and the waiter's name:
══════════════════════════════
  KITCHEN            Table 5
──────────────────────────────
  Course 1

  2× Schnitzel
     → without fries
     → with rice
  1× Lasagna

  Waiter: Maria    18:45
══════════════════════════════
Multiple Printers for Different Areas
You can set up different printers for different areas:
| Printer | Article Groups | Location |
|---|---|---|
| Kitchen printer | Dishes, sides | Kitchen |
| Counter printer | Beverages, cocktails | Counter/Bar |
| Dessert printer | Desserts, ice cream | Patisserie |
| Pager printer | Pager system | Pickup |
Each article group can be assigned to its own printer — or to multiple printers simultaneously (e.g., kitchen + consolidated order ticket).
Print Assignment at Article Level
The print assignment follows a hierarchy:
- Article's own print setting (highest priority)
- Article group of the article
- Parent article group (parent group)
Additionally, ExtraPrintOptions can be configured per table group — e.g., "Terrace orders on printer 2".
🖥️ Kitchen Display (KDS)
The kitchen display (Kitchen Display System) shows orders on a screen — no paper, no clutter. New orders appear in real time via SignalR websocket.
Setup
- Admin → Settings → Operations → Enable kitchen display
- Open a browser on the kitchen screen
- Navigate to:
http://[Server-IP]:5015 - Log in and select Menu → Kitchen display
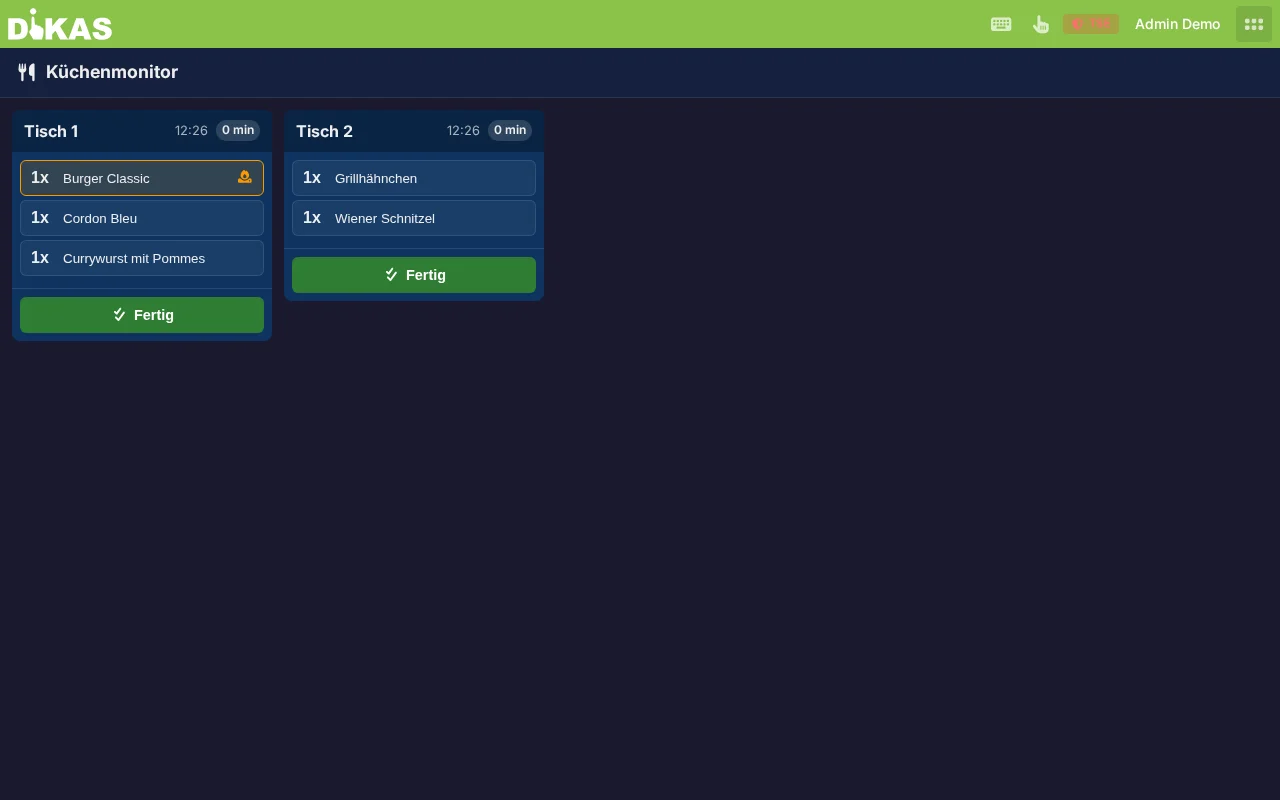
Order Display

Orders are displayed as cards per table, sorted by arrival time (oldest first):
┌───────────────┐  ┌───────────────┐  ┌───────────────┐
│ Table 5       │  │ Table 2       │  │ Table 8       │
│ 18:45 (3 min.)│  │ 18:42 (6 min.)│  │ 18:31 (17 min)│
│───────────────│  │───────────────│  │───────────────│
│ Course 1      │  │ Course 1      │  │ Course 2      │
│ 2× Schnitzel  │  │ 1× Pizza      │  │ 3× Burger     │
│   → without   │  │ 1× Salad      │  │   → medium    │
│     fries     │  │               │  │ 1× Steak      │
│ 1× Lasagna    │  │               │  │   → rare      │
│               │  │               │  │               │
│  [🔥 Cooking] │  │  [🔥 Cooking] │  │  [✅ Done]    │
└───────────────┘  └───────────────┘  └───────────────┘
        white            orange              red
Color Coding (Wait Time)
The cards change color based on wait time — so the kitchen can see at a glance which orders are urgent:
| Wait Time | Color | Meaning |
|---|---|---|
| 0–5 minutes | White | New order, everything on schedule |
| 5–15 minutes | Orange | Order is waiting — attention needed |
| Over 15 minutes | Red | Critical — order overdue |
The wait time is calculated from the time of the oldest item on the table.
Work Status (WorkStatus)
Each order goes through a 5-step workflow:
  New          Cooking       Done         Packed        Completed
  (0)    →     (1)     →     (2)     →     (3)     →     (99)
 ┌────┐      ┌────┐       ┌────┐       ┌────┐        ┌────┐
 │ 📋 │  →   │ 🔥 │   →   │ ✅ │   →   │ 📦 │   →    │ ✓  │
 └────┘      └────┘       └────┘       └────┘        └────┘
| Status | Value | Description | Display |
|---|---|---|---|
| New | 0 | Order received, not yet started | Default card |
| Cooking started | 1 | Cook has started preparation | Orange border + flame icon |
| Cooking done | 2 | Preparation complete, ready for plating | Green border + checkmark |
| Packed | 3 | Plated/packed, ready for pickup | Disappears from monitor |
| Completed | 99 | Served/delivered | Disappears from monitor |
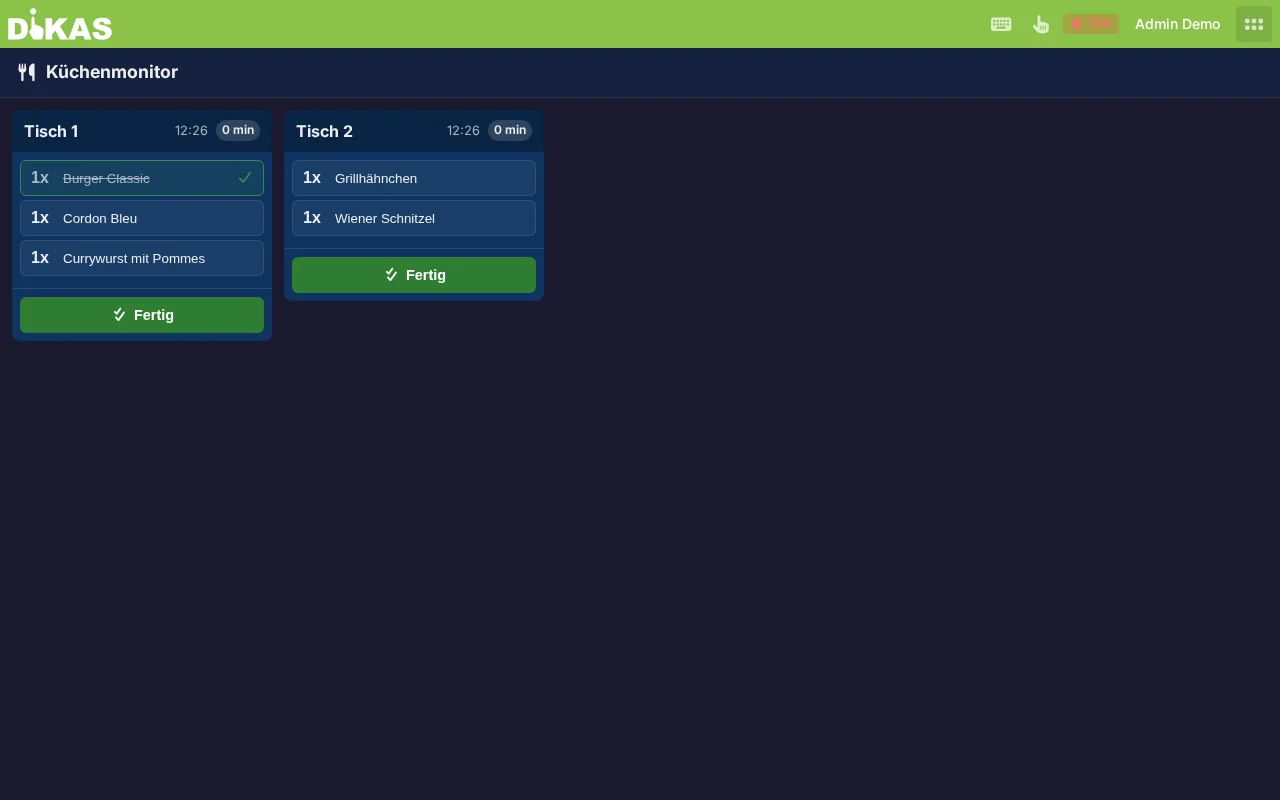
"Done" Button
When all items for a table have been prepared:
- Tap "Done" on the table card
- All items are set to status "Completed" (99)
- The card disappears immediately from the monitor (optimistic update)
- The waiter sees in the POS that the order is ready
The status change is transmitted to all connected devices in real time — including other kitchen displays and the POS.
Course Control on the Monitor
Orders are grouped by course within each table card:
┌──────────────────┐
│ Table 5          │
│ 18:45            │
│──────────────────│
│ Course 1         │
│ 1× Tomato soup   │
│ 1× Bruschetta    │
│                  │
│ Course 2         │
│ 1× Beef fillet   │
│ 1× Salmon fillet  │
│                  │
│ [Done]           │
└──────────────────┘
When the waiter triggers a course change at the table (POST /api/v1/tables/{id}/gang), the new course is automatically communicated to the kitchen and a course ticket is printed on the assigned printer.
Delivery Service Tab
If the delivery service is enabled (Admin → Settings → Operations → Delivery service), a second tab "Delivery service" appears in the kitchen display.

Delivery Service Orders in the Kitchen
| Column | Description |
|---|---|
| Order number | e.g., "#1042" |
| Customer name | Name of the person who placed the order |
| Desired delivery time | If specified |
| Items | Articles with quantity and notes |
Delivery Service Status
Delivery service orders have their own status workflow:
| Status | Value | Description |
|---|---|---|
| Pending | 0 | Order received |
| Confirmed | 1 | Order accepted |
| In preparation | 2 | Being prepared in the kitchen → visible in kitchen display |
| Ready | 3 | Preparation complete, waiting for pickup/driver |
| On the way | 4 | Driver is en route |
| Delivered | 5 | Delivered |
| Cancelled | 6 | Order cancelled |
Only orders with status "In preparation" (2) are shown in the kitchen display. The "Ready" button sets the order to status 3 and it disappears from the kitchen view.
⚡ Real-Time Updates (SignalR)
The kitchen display uses SignalR (websocket connection) for real-time communication:
Waiter places order
        ↓
  Server saves OpenBon
        ↓
  SignalR sends "DocumentChanged"
        ↓
  Kitchen display receives signal
        ↓
  Card appears instantly on the monitor
How it works: - Every change to an OpenBon (new order, status change, void) triggers a SignalR event - All connected kitchen displays update automatically - No manual reloading required - Works across multiple kitchen displays simultaneously (e.g., kitchen + bar)
Configuration at Article Level
Which articles appear in the kitchen display is controlled via the print options:
Admin → Articles → [Article/Group] → Print options → Kitchen display
| Setting | Description |
|---|---|
| Enabled | Article appears in the kitchen display |
| Target workstation | Optional: Show only on a specific monitor |
| Extra ticket after done | Automatically print a ticket when "Done" is tapped |
| Extra ticket printer | Which printer for the extra ticket |
The kitchen display setting is inherited hierarchically: If the article group "Dishes" is enabled for the kitchen display, all articles in this group automatically appear.
Advantages Over Printer-Only Operation
| Property | Printer | Kitchen Display |
|---|---|---|
| Paper consumption | High | None |
| Overview | Paper clutter | All orders at a glance |
| Real time | Ticket must be read | Instant display + update |
| Sequence | Tickets can get mixed up | Automatically sorted by wait time |
| Status tracking | Not possible | 5-step workflow |
| Urgency | Not visible | Color coding by wait time |
| Feedback | None | "Done" → Waiter is notified |
| Void | New ticket needed | Automatically updated |
💡 Tip: Even if you use the kitchen display, you can additionally configure a kitchen printer as a backup — e.g., in case the monitor fails.
Practical Example: Restaurant with Kitchen and Bar
Situation: Restaurant "Bella Vista" with a separate kitchen and bar.
Setup: - Monitor 1 in the kitchen: Shows only food groups - Monitor 2 at the bar: Shows only beverage groups (filtered via target workstation) - Backup printer in the kitchen for outages
Workflow: 1. Waiter Maria places an order at Table 5: 2× Schnitzel + 2× Wheat beer 2. Schnitzel appears instantly on Monitor 1 (kitchen) 3. Wheat beer appears on Monitor 2 (bar) 4. Bartender pours wheat beer → Taps "Done" → Card disappears 5. Cook prepares schnitzel → Taps "Done" → Card disappears 6. Maria sees in the POS: Table 5 is ready to be served
API Endpoints
| Method | Endpoint | Description |
|---|---|---|
| GET | /api/v1/open-bons/kitchen |
All open kitchen orders |
| PATCH | /api/v1/open-bons/{id}/work-status |
Change work status |
| POST | /api/v1/tables/{id}/gang |
Trigger course change |
Frequently Asked Questions
Does the kitchen display work on a tablet? Yes. The kitchen display is a web application and works on any device with a browser — tablet, PC, TV screen.
What happens with a void? Voided items automatically disappear from the kitchen display. If the cook has already prepared the item, they see the change immediately.
Can I run multiple kitchen displays simultaneously? Yes. Each monitor can be filtered to specific article groups via the target workstation. All monitors are synchronized via SignalR.
Do I need internet for the kitchen display? No. The kitchen display runs entirely on the local network. The devices only need to be able to reach the DiKAS server.
Online and QR Orders on the Kitchen Display
When DiKAS is used with a cloud connection, online orders, delivery and pickup orders, and QR table instant orders appear automatically and instantly on the kitchen display — just like orders placed by a waiter at the table.
The kitchen display does not distinguish between the source: whether a waiter places an order at the table or a guest orders via the web shop — the ticket appears immediately on the display.
- Online orders / delivery service: appear in the "Delivery" tab (see above)
- QR table instant orders: appear directly in the regular table view
How it works
The cloud forwards incoming orders immediately to the local machine (relay). The local machine then updates the kitchen display in real time — no manual refresh needed. → More details: Cloud & Local Machine
Next Step
→ End-of-Day Report — Close the shift and cash count