Basic Setup¶
After your first login, you should configure the most important settings. Navigate to the Admin area (Menu → "Admin").
1. Check Business Data¶
Admin → Einstellungen → Allgemein
Business name, address, tax number, and VAT ID are automatically imported from your license and appear on every receipt, every invoice, and in the TSE. This data cannot be changed here — for corrections, contact DiKAS support.
Under Allgemein you can additionally configure:
| Field | Description |
|---|---|
| Logo | Printed on receipts (upload image, max. 576px wide) |
| Payment methods | Manage active payment methods |
| Allergens | Maintain allergen list per EU regulation |
| Service areas | Create areas such as indoor, terrace, beer garden |
| Workstations | Configure POS workstations |
2. Check Tax Rates¶
DiKAS comes pre-configured with the standard German tax rates:
| Tax class | Rate | Usage |
|---|---|---|
| Standard (19%) | Standard rate | Beverages |
| Reduced (7%) | Reduced rate | Food (since 01.01.2026 uniformly 7%, regardless of dine-in or takeaway) |
| Tax-free (0%) | No VAT | Voucher sales, deposits |
These rates are assigned to articles when they are created. For most businesses, no changes are needed.
Tax rate periods: If tax rates change (as in 2020 with the temporary reduction), you can create date-based periods. DiKAS automatically selects the rate valid for the transaction date.
3. Payment Methods¶
DiKAS supports various payment methods. The most important ones are pre-configured:
| Payment method | Type | Description |
|---|---|---|
| Bar (Cash) | Cash | Cash payment with change calculation |
| EC-Karte (Debit card) | Card | Card payment via debit card terminal |
| Kreditkarte (Credit card) | Card | Card payment |
| Hausbon (House tab) | Invoice | On account (corporate customers) |
You can customize these payment methods under Admin → Einstellungen → Betrieb → Zahlungsarten, rename them, or add new ones (e.g., "Kundenguthaben" for customer credit, "Gutschein" for vouchers).
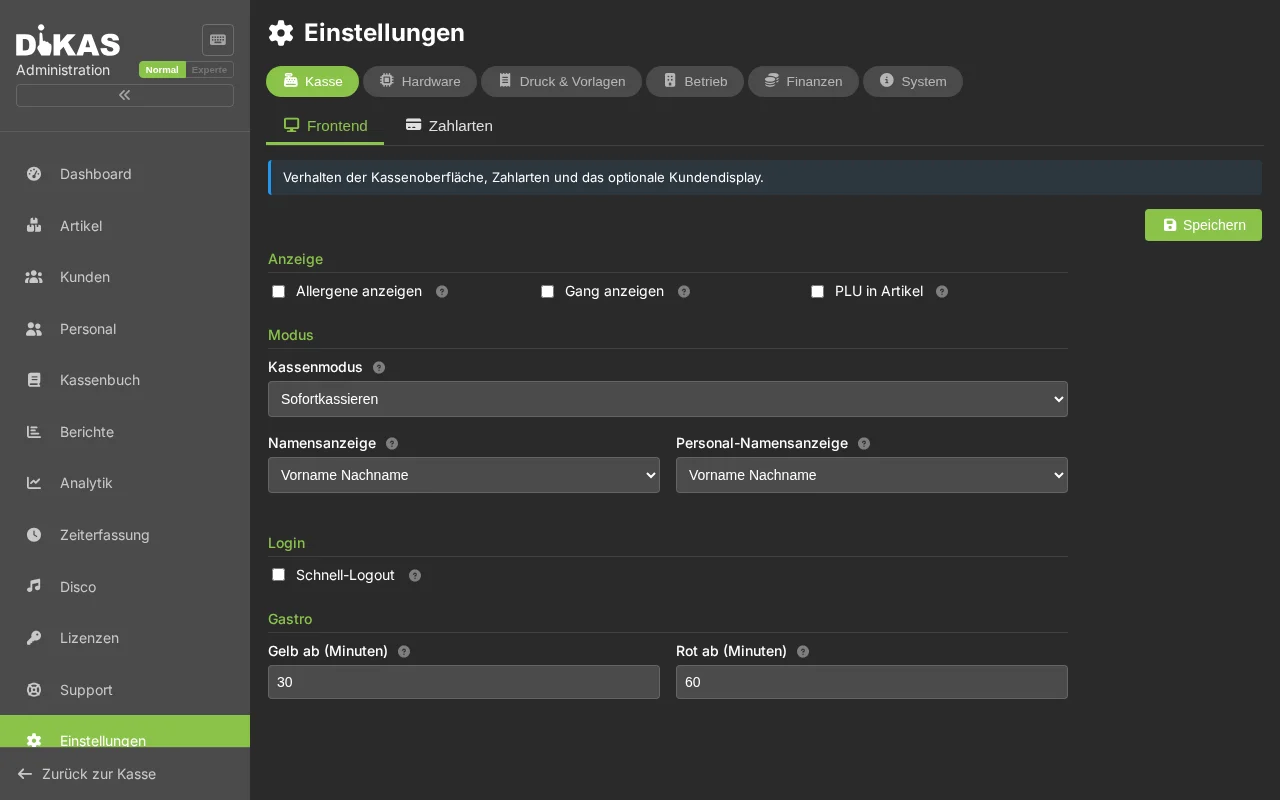
4. 🖨️ Setting Up Printers¶
Admin → Einstellungen → Drucker
DiKAS also works completely without printers — receipts can be displayed as PDFs. However, if you use a receipt printer:
Network Printer (recommended)¶
Most hospitality printers (Epson, Star, Bixolon) are connected via network:
- Click "+ Drucker" (+ Printer)
- Fill in:
| Field | Example | Description |
|---|---|---|
| Name | Bondrucker Theke | Freely selectable |
| Type | Netzwerk (Network) | ESC/POS over TCP/IP |
| IP Address | 192.168.1.50 | Printer's IP address |
| Port | 9100 | Standard for thermal printers |
| Receipt width | 80 mm | 80 mm (standard) or 58 mm |
| Backup printer | — | Fallback in case of failure |
- Click "Speichern" (Save) → "Test" to print a test receipt
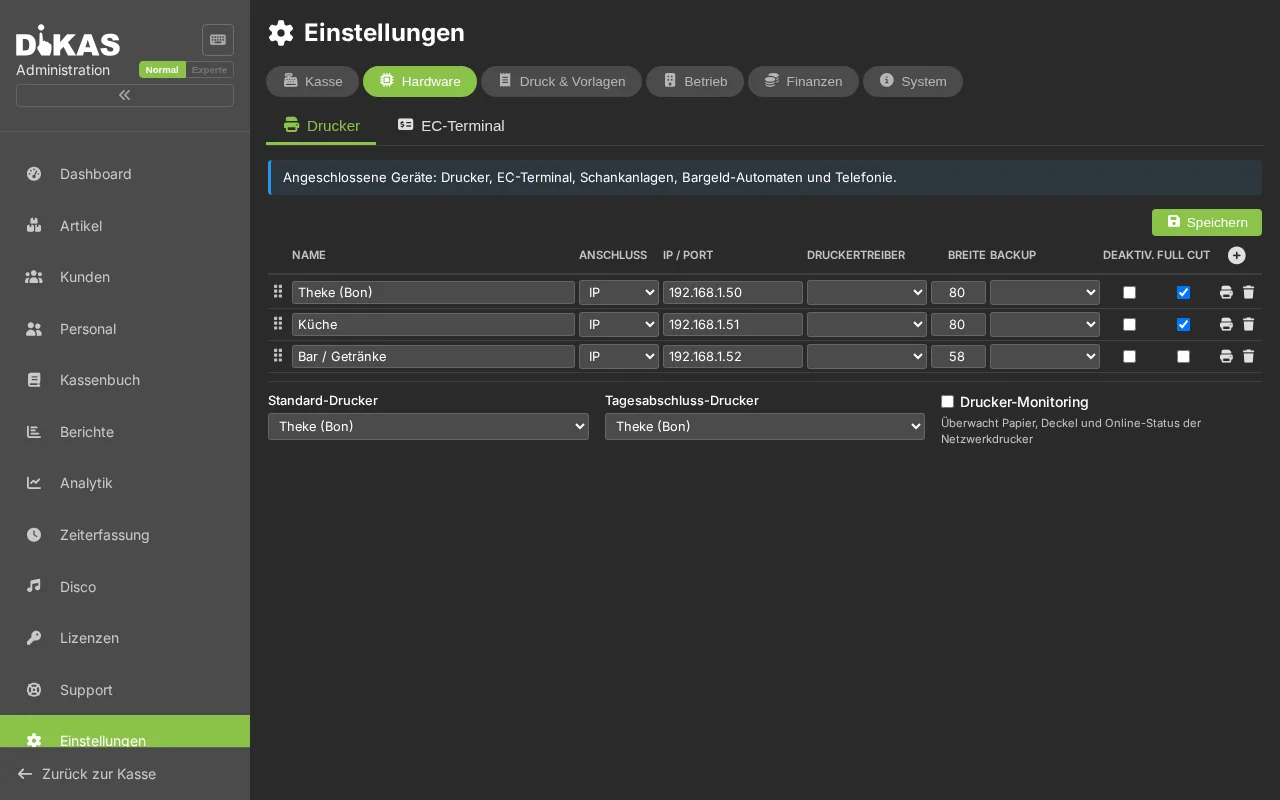
Multiple Printers¶
Typical printer configuration for a restaurant:
| Printer | Location | Usage |
|---|---|---|
| Receipt printer | Counter / POS | Receipts for guests |
| Kitchen printer | Kitchen | Orders (consolidated order tickets) |
| Bar printer | Bar / Counter | Beverage orders |
Which articles are printed on which printer is configured in the Articles section under "Druckeroptionen" (Printer options).
Without a Printer¶
No printer? No problem: - Receipts are displayed as PDFs in the browser - Invoices can be sent by email - For tax authorities, the digital TSE signature is sufficient
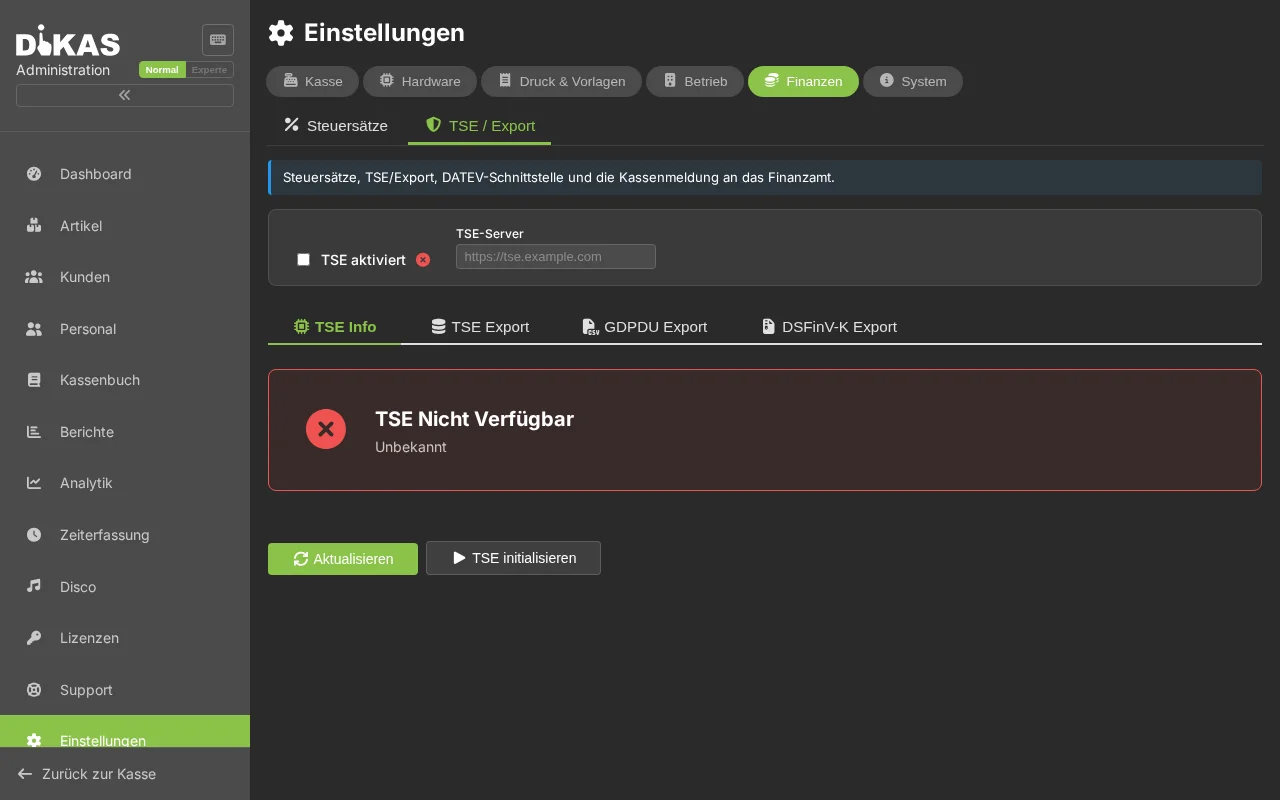
5. 🔐 Setting Up the TSE (mandatory in Germany)¶
Since 2020, a Technical Security Device (TSE) has been mandatory for POS systems in Germany (§ 146a AO).
Admin → Einstellungen → TSE
| Field | Description |
|---|---|
| TSE enabled | Must be activated for live operation |
| TSE type | Hardware (Swissbit USB stick) or Cloud/Proxy |
| TSE server | For cloud: URL of the TSE server (e.g., Fiskaltrust) |
| POS serial number | Unique identifier of your POS |
| Client ID | TSE client identification |
What gets signed?
DiKAS signs all POS-relevant transactions: - Receipts (sales, payments) - Orders (table orders) - Other transactions (end-of-day report, shift changes, expenses)
The TSE data (signature, transaction number, serial number) appears on every receipt and can be audited by the tax authorities.
6. 💳 Connecting a Card Terminal (optional)¶
Admin → Einstellungen → Terminals
If you use a card payment terminal:
- Click "+ Terminal"
- Select the type:
| Type | Description | Connection |
|---|---|---|
| ZVT | Classic card terminal (Ingenico, Verifone, CCV) | IP + Port (default: 20007) |
| SumUp Reader | SumUp Solo card reader | Cloud API (API key) |
| Tap-to-Pay | Contactless via Android smartphone | Android SDK |
| Simulator | For testing without a real terminal | Local |
- Enter IP address and port (for ZVT)
- Click "Speichern" (Save) → "Status prüfen" (Check status)
Advantage of ZVT: You communicate directly with the terminal — no percentage-based fees to DiKAS. You negotiate the conditions directly with your acquiring partner (e.g., Sparkasse, Concardis).
7. Setting Up Email (optional)¶
Admin → Einstellungen → E-Mail
If you want to send invoices or vouchers by email:
| Field | Example | Description |
|---|---|---|
| SMTP Server | smtp.ionos.de | Mail server of your provider |
| Port | 587 | STARTTLS (587) or SSL (465) |
| Username | info@pizzeria-mario.de | Your email address |
| Password | ••••••• | Email password or app password |
| Sender name | Pizzeria Da Mario | Name shown in the recipient's inbox |
SMTP detection: Simply enter your email address and click "Erkennen" (Detect) — DiKAS will automatically try to determine the correct SMTP settings.
8. Activating Modules¶
Admin → Einstellungen → Betrieb
Only enable the modules you need — everything else stays deactivated and won't get in the way. You will find the modules further down on the Betrieb page (scroll down).
| Module | When to activate? |
|---|---|
| Kitchen display | When the kitchen should see orders on a screen |
| Time tracking | When employees should clock their working hours |
| Reservations | When you accept table reservations |
| Customer points | When you offer a loyalty points program |
| Expense tracking | When cash withdrawals and expenses should be recorded |
| HACCP | When you want to manage hygiene documentation digitally |
| Workshop | When you manage repair orders (e.g., bicycle café) |
✅ Basic Setup Checklist¶
- Business data from license verified (name, address, tax number)
- Tax rates verified (19% / 7% / 0%)
- Payment methods configured
- Printer set up and test receipt printed
- TSE activated and serial number entered
- Card terminal connected and status verified
- Email configured (if invoice sending is desired)
- Required features activated
Next Step¶
→ Creating Articles — Create your menu in DiKAS